Resolve Intel NUC 12th Gen network adapter issue during Nutanix CE installation

On this page
Introduction
During my weekend, I attempted to install the latest Nutanix Community Edition on my newly acquired Intel NUC 12th Generation (NUC12WSKi5).
Upon booting, I encountered an error where the Nutanix CE Installer failed to recognize my built-in Intel® Ethernet Controller I225-V 2.5GbE Network Adapter.
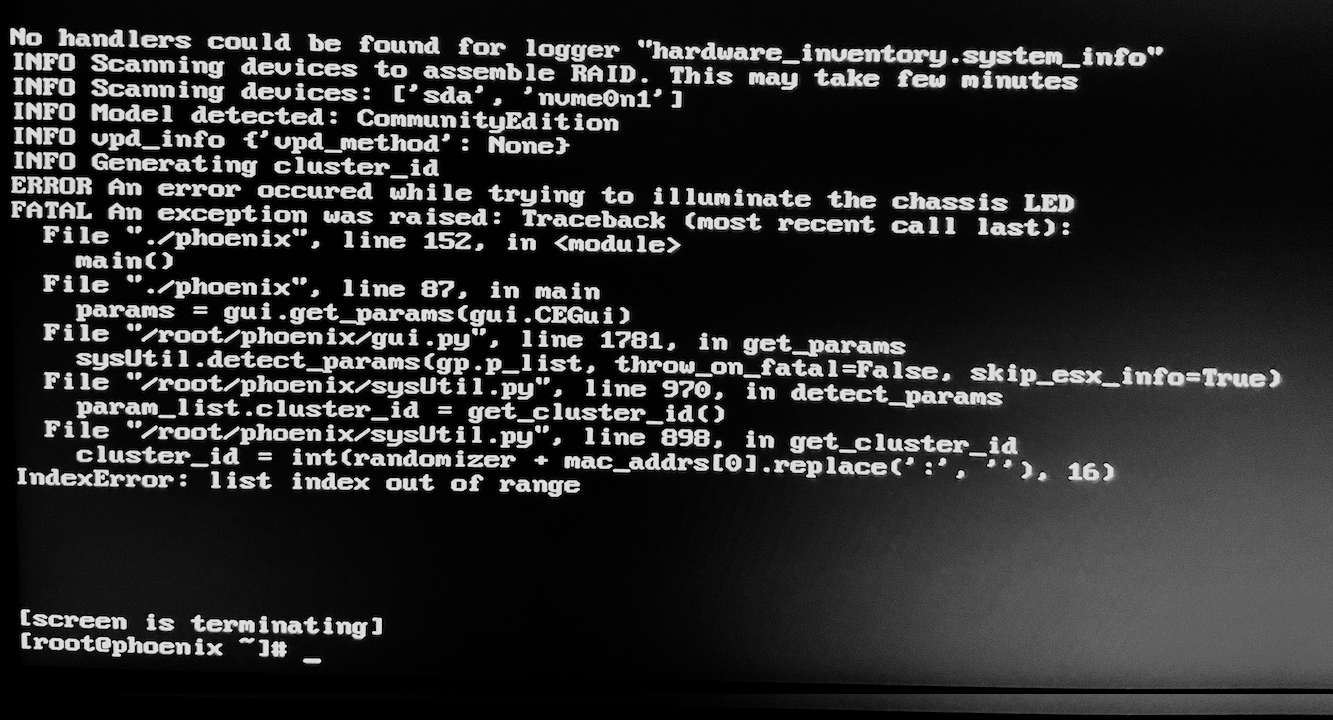
ERROR An error occured while trying to illuminate the chassis LED
…
cluster_id = int(randomizer + mac_addrs[0].replace(’ :’ , ”), 16)
Solution: Backported Kernel Module
After conducting some research, I discovered the matching solution at https://smzklab.net/2023/04/nutanix-ce-2-0-how-to-resolve-intel-2-5gbe-nic-issue.html. Satoshi, who also happens to work at Nutanix, not only explained how to backport the Intel Driver but also provided an already assembled Kernel module. Since the article and process description is in Japanese, I translated the steps into English after consulting with Satoshi.
Credit for this work goes to Satoshi Shimazaki. If you simply want the pre-built “igc-patched.ko” module, follow the link below to his blog, where you can download the needed Kernel module directly. Otherwise, you can follow the steps provided below to build the module by yourself.
igc-patched.ko for Nutanix CE 2.0
Size: 190104 bytes
MD5: f9c0cc0c223aafe5958c05305d3c7fc6
https://smzklab.net/2023/04/nutanix-ce-2-0-how-to-resolve-intel-2-5gbe-nic-issue.html
Build the Kernel Module by yourself
Setting up the build environment
Firstly, all of the following steps need the Terminal in a working Linux Distribution/environment.
I used a virtualized Ubuntu Desktop Live CD via Virtualbox.
-
Update the list of available packages:
sudo apt-get update -
Install the required packages for the build:
sudo apt install flex bison libssl-dev libelf-dev
Preparing files for the build
- Download the Linux kernel sources:
mkdir /usr/src/kernels && cd /usr/src/kernels
wget --no-check-certificate https://cdn.kernel.org/pub/linux/kernel/v5.x/linux-5.10.2.tar.gz
wget --no-check-certificate https://cdn.kernel.org/pub/linux/kernel/v5.x/linux-5.10.139.tar.gz
(Note: 5.10.2 is the CE-Installer kernel version, and 5.10.139 is the same kernel version as AHV. We chose this version because the IGC works correctly in AHV.)
-
Extract the downloaded files:
tar zxvf linux-5.10.2.tar.gztar zxvf linux-5.10.139.tar.gz -
*The extracted directories will be arranged as follows:
/usr/src/kernels┣linux-5.10.139┗linux-5.10.2
Obtain the kernel configuration file
To build the kernel or kernel modules, you need a configuration file (.config file) defining the build settings (such as enabling/disabling specific features) placed at the top level of the source tree. Instead of creating a .config file yourself, copy the configuration used in the CE-Installer. Boot the CE-Installer and get the file from there. It doesn’t matter if you don’t reach the installer menu; as long as the shell starts up, you’re fine. Use a physical machine, Hyper-V, VirtualBox, or another virtual machine for booting. Also, it doesn’t matter if the CPU, memory, and disk don’t meet CE’s operating requirements.
-
Mount the USB Stick and copy the file /proc/config.gz onto a USB Stick.
-
Extract and place the kernel configuration file:
gunzip config.gzmv config .configcp .config /usr/src/kernels/linux-5.10.2/
Backporting
Backporting in this case simply means copying files from the new version of the source tree to the old version of the source tree. First, back up and store the existing files.
cd /usr/src/kernels/linux-5.10.2
mv drivers/net/ethernet/intel/igc drivers/net/ethernet/intel/igc.bk
mv drivers/pci/pci.h drivers/pci/pci.h.bk
mv include/linux/pci.h include/linux/pci.h.bk
Then, copy the files from the new version of the source tree.
cp -a ../linux-5.10.139/drivers/net/ethernet/intel/igc drivers/net/ethernet/intel/igc
cp ../linux-5.10.139/drivers/pci/pci.h drivers/
Building the kernel module
Prepare to build only the kernel module.
make modules_prepare
Build only the kernel module in the specified directory. Even if there are warnings, it’s okay to ignore them as long as the igc.ko build is successful.
make M=drivers/net/ethernet/intel/igc
Check if the built kernel module was created.
ls -l drivers/net/ethernet/intel/igc/igc.ko
Load the built kernel module
-
Transfer the built igc.ko to the CE-Installer where the installer stopped, e.g. via a USB stick. Mount the USB memory and copy the file.
-
Remove the non-functioning igc kernel module:
rmmod igc -
Load the new igc kernel module:
insmod igc.ko -
Use the
dmesgcommand to check if the NIC is recognized.
Re-running the installer
Now you can rerun the Nutanix CE Installer with the following command
./ce_installer && screen -r